Saturday 5 July 2014

Tobias' Kokos bollar, (coconut balls) vegan, gluten free, sugar free

 Kokos bollar are a wonderfully calorific treat from sweden that I have grown up with, they consist of butter, sugar, chocolate and a little bit of booze, basically all the naughty things that eventually contribute to a kardashian bottom, as if this little ball is not bad enough a bakery would usually serve this spherical treat with lashings of whipped double cream. Don't get me wrong I am not about to bad mouth one half of my culinary roots, it's naughty food sure, but every once in a while it can be a treat. 
 My current situation is that I am fighting an uphill battle against the bulge, even more unfortunate is that I live with two absolute freaks of nature who can pretty much each anything that they desire and never gain an ounce. It is a difficult thing to eat healthily in a house full of cake loving midnight scoffers, especially when I love food in all its guises, I live to eat not eat to live. 
I really felt like I need to come up with a little sweet treat containing only natural good foods, something that you would not require a lot of in order to appease a sweet craving, but something that is so delicious that even my sugar addicted family would also appreciate, ridding myself of all temptation and the dreaded kardashian bottom! I decided to adapt this Swedish recipe, making it vegan for a start, no dairy, no gluten, no sugar (sounds scrummy??) I have to say that everyone who has tried them so far has all said exactly the same thing, it tastes like a snickers bar, and it really does, now i'm not telling all you dieters out there to make these and eat a batch, but if you feel temptation is looming pop in one of these kokos bollar and you are good to go. Kids love them and even my cake-a-betic husband does too.

5 tablespoons of smooth peanut butter 
1.5 cups of rolled oats 
5 tbsp of agave nectar. This can be subbed with honey but it would not be vegan anymore.
a pinch of salt 
3 tbsp of cocoa powder
10 plump dates remove the pips please
1 tbsp of date syrup or you can substitute this with extra agave 
1 tbsp of left over black coffee 
1 cup of desiccated coconut 

Place all of the above ingredients into a food processor apart from the coconut and blitz until is looks like a dough, roll into small balls and then roll in desiccated coconut. Thats it!


Sunday 8 June 2014

Salt and pepper Squid


 I love seafood in all of its guises, you name it i'll eat it. It's funny I could probably live my life happily as a vegetarian, but seafood would be the chink in my armour, I know a lot of vegetarians who have fallen off the wagon purely from the smell of cooking bacon, well seafood cooking for me is like my bacon, I cannot resist it.
 Squid is one of those funny things that people are absolutely petrified of, they do not know how to deal with it, granted it is probably not the most approachable or aesthetically pleasing, however it is a very easy thing to prepare and even easier if you have a fabulous fish monger who will do it for you. I think that for a lot of people squid is probably associated with terrible european all inclusive holidays, where calamari probably serves a greater 
purpose as a hair bobble than an appetising dish. Squid is so underrated and is so delicious when cooked properly, it either has to be cooked very quickly on a very high heat or cooked low and slow for a long time. Salt and pepper squid is one of those fabulous dishes that unfortunately has somehow gotten lost in translation, we have managed to westernise a dish that is pure perfection in its own right, much like carbonara, pizza, korma, you name it, us brits have somehow managed to destroy the integrity and origins of the dish. I happen to think that salt and pepper squid when cooked in this wonderful way could even sway the most squeamish of folk. It is so very simple to do and unbelievably delicious, if my husband can make this recipe anyone can, I urge you to try......

You will need:
400g of cleaned squid, the tubes scored and beaks removed from the tentacles 
1 1/2 tbsp of shaoxing rice wine
3 eggs beaten
12 tbsp of corn or potato flour
12 tbsp of plain flour
1/2 tsp of sichuan pepper corns
1 tsp of black pepper corns
2 1/2 tsp of maldon sea salt
600ml of vegetable oil to fry
4 tbsp of chopped garlic
4 tbsp chopped spring onions, both white and green parts
2 large chopped red chillies
2 large chopped green chillies

 The first thing to do is to clean and prepare your squid, score the tubes in a diamond fashion but do not cut through the squid, but each tube into three, remove all beaks from the tentacles, if you have a great fishmonger they will do it for you. Once the squid is prepared place it into a bowl and allow it to marinate in the rice wine for 15 minutes. Meanwhile prepare the crispy coating for the squid, place the plain flour on one plate, in a bowl whisk the eggs until fully mixed, lastly place the corn or potato flour onto another plate but add the salt and both types of ground peppercorns (please freshly grind them, even better if they are toasted first), mix the seasoning into the flour thoroughly.

 Heat up the oil, then dry the squid onto kitchen paper. Firstly dip  each piece of squid into the plain flour, then the egg followed by the seasoned corn flour, then straight into the hot oil, it should take only a minute to fry the squid but try not to overcrowd the pan as it will reduce the heat in the oil. Place the cooked pieces of squid onto a kitchen paper until they are all cooked. Drain away all of the oil from the pan apart from 2 tablespoons and then fry the aromatics, garlic, spring onion and the chillies until they a softened and smell delicious, quickly toss in the squid and coat with the aromatics. Turn of the heat and serve immediately.


Sunday 11 May 2014

Wild Garlic and pea Risotto


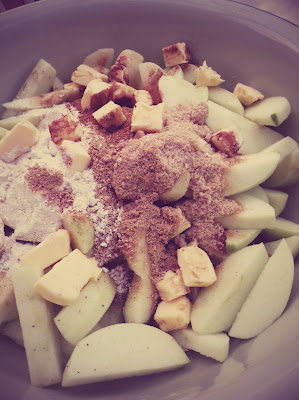
 I have to apologise profusely to my followers and regular readers, I have temporarily been on hiatus from blogging for a while, it's nothing personal, I have just been gathering a plethora of fool proof recipes before blogging, whilst running a kitchen at work and also becoming food ambassador for my area for the Jamie Oliver's foundation, so you could say that officially all my balls are in the air (excuse my lewdness)! At the start of the year I decided to spend the first month being dedicated to vegetarianism, it was a kind of cleanse after christmas, Christmas is usually a carnivores delight and I tend to become fed up of meat by january, this definitely changed my outlook on food and made me appreciate the fact that meat should be a treat and treat with respect, since then I have eaten mostly vegetarian food. Am I a vegetarian? No, absolutely not but I do feel that if we are willing to kill an animal for our consumption the very least we can do it give the animal a great life before D day. 
 The best part about our vegetarian challenge is that it automatically requires you to think outside of the box, it is all too easy to concoct a meal consisting of meat and two veg, after all we are a meat and two veg nation, a vegetarian meal require a little more thinking. 
 Currently wild garlic is in abundance in the UK and it is one of those things that most people have never tasted which I think is a real shame, in the UK we have some of the most amazing produce growing wild right on our doorstep, but due to lack of knowledge or enthusiasm we do not feel comfortable picking or foraging our own food unless it comes in a uniform plastic package!! Food never tastes better than when it is free and when you have personally picked it yourself. Wild garlic is one of those things that actually tastes even better than you imagine, the flavour is totally addictive, and works so well in my wild garlic and pea risotto.

 Please note that risotto is not a flipping side dish, it is the main dish. I believe it was Rick Stein who visited Italy and asked a local cook what was in the risotto and she replied "really good stock". That sums it up for me, great food is uncomplicated, it is about the stock and the stunning wild garlic. 
 I want to dedicate this recipe to Daniella Patrizi, our friend from afar, who inspires my love for Italian food on a daily basis, and is an avid follower of my wonderfully talented Husband Mark, this ones for you Dani.

2 large echalion shallots finely chopped
1 sticks of celery finely chopped
1  large garlic clove finely chopped
1 litre of chicken stock, if it is mild add two tsp of maldon sea-salt
50g butter to fry
1 tbsp olive oil
200g carnaroli rice
170 ml very dry white wine
75g of good parmesan
10 wild garlic leaves finely sliced
1/2 cup of frozen or fresh peas 
50g extra butter to finish
2 tsp cracked black  pepper

 Finely chop the shallots, celery and garlic and cook in 50g of butter and the olive oil until translucent.  
 Place the stock in a pan and keep in on a simmer, you should never add cold stock to the risotto. 
 Once cooked add the rice and cook the rice smells aromatic but not golden, immediately add the wine ad stir constantly until the wine evaporates.
 Add the stock a ladle at a time on a medium heat ensuring that each ladle has being absorbed before adding the next ladle of stock.
 Keep stirring with a wooden spoon, when all of the stock is absorbed add the remaining 50g of butter, the parmesan, peas and wild garlic.
 Immediately turn of the heat and continue to stir, add a little cracked black pepper and serve immediately, the texture should be a soft oozy plate of rice and NEVER a firm ball of rice.


Tuesday 4 March 2014

Sunshine Pancakes


 When it comes to tradition I am always a non conformist, with Shrove tuesday rapidly approaching us I devised a task to come up with an amazing alternative pancake recipe. I thought back to my days in New Zealand where I remembered having a sweetcorn fritter crossed with a savoury pancake, it was totally delicious, my alternative Pancake was born. I know that a lot of people are not necessarily pancake lovers and a savoury pancake would be a welcome change for most. I always associate Sweetcorn with summer time, bbq's, and mexican food, hence the name sunshine pancakes. The Pancake batter packs quite a punch, if you are not a chilli lover just leave them out.
 This was a total success without a shadow of a doubt, so much so that I converted my pancake hating husband to love them. In my Pancake recipe I place half a prawn on top of each one so that it cooks into the batter, if you do not like prawns you can place a couple of slices of chorizo instead, if you are vegetarian just cook the batter, the possibilities are endless.

You will need:
(for the batter)
200ml of whole milk
2 large free range eggs
150g of self raising flour
75g of maize flour or polenta
1 tsp of baking powder
2 tbsp of caster sugar
2 1/2 tsp of maldon sea salt (must be maldons, table salt is too harsh)

For the vegetables:
2 finely chopped fresh green jalapenos
1/2 a red pepper finely diced
1 small red onion finely chopped
2 fresh corn on the cob with the corn removed (see below image)
1 tbsp of chopped garlic
1 tsp of cumin powder
1 tsp of paprika
50g of butter
1 tsp of maldon sea salt
4 tbsp of chopped coriander
between 6-9 raw tiger prawns (depending on the size of your pancakes)

To remove the sweetcorn from the husks place a smaller bowl upside down inside of a larger bowl, prop the bottom of the corn onto the bowl and slice the sweetcorn off by running the knife down the side of the husk, the sweetcorn should fall into the bowl.
Melt the 50g of butter in a frying pan and fry the onions, pepper and the jalapenos until they are softened, add the paprika, cumin, chopped garlic and sweetcorn, season with a tsp of salt and cook on a low heat for five minutes. Remove the vegetables off the heat and stir in the coriander, allow this mixture to cool thoroughly. Meanwhile prepare the pancake batter, sift all of the dry ingredients into a bowl, whisk the eggs and milk together and add this to the dry ingredients, whisk until just combined but smooth. Add the cooled vegetable mixture to the pancake batter and mix until fully combined.
 Fry a couple of dollops of the batter to make up one pancake in a frying pan with a little melted butter. 
Place a prawn half (split lengthways) onto the top of the uncooked batter, when bubbles begin to appear on the surface flip the pancake, it should only take a few minutes either side. Serve with Sweet chilli sauce!

The ultimate Swedish pancake


Serves 6 people
Makes 20 pancakes
For the pancakes
You will need:
3 large eggs
600ml of whole milk
1 tsp of salt
1 tbsp of caster sugar
1 tsp of vanilla extract
2 tablespoons of melted butter
275g of plain flour sieved.

Add all of the wet ingredients into a bowl and add the flour, sugar and salt into the bowl a bit at a time. Whisk until smooth.
In a pancake pan or non stick frying pan add a small knob of butter and a ladle full of the batter, cook on a medium heat. Flip the pancake when the underside is golden. Cook the other side for a further minute. Repeat until the batter has gone.

Normally in Sweden we would fill our pancakes with whipped cream and jam, but the english half of me always sticks to golden syrup.

Saturday 18 January 2014

South Indian avial curry


 Unless you have a traditional South Indian restaurant as your local curry house or you have personally visited southern India, I highly doubt that many of you haven't even heard of avial curry let alone tried it. For the misfortunate folks who have never tasted the infamous avail curry I can set the record straight by personally informing you that you are missing out, I fear that there may be a void in your life that can only be filled by this coconutty vegetable elixir.
  I first stumbled across this wonderful dish whilst in varkala in Kerala, after a rather brutal Ayurvedic massage (which felt more like sweet revenge than a massage) I sought solace in a the goodness of fresh vegetables in a tangy sauce, spiked with chilli.
I know a lot of people would love to cook indian food but are simply too scared because they think that ever spice under the sun and the kitchen sink goes into a curry, I have to be honest and say so did I,  I too was guilty of over complicating what I thought was authentic curry. If you are an indian food beginner , southern indian cuisine is super simple, fast and fresh and pretty much fool proof.  The vegetables that I have used are traditional in an avial however you can adapt the types of vegetables to your own palate. I have to say that I was thrilled to find out that a South Indian restaurant had opened in our city, great restaurants in East Yorkshire are few and far between, so when I found a South Indian restaurant that was not only authentic but was so good it made me weep I was elated. This brought the decent restaurant count within a ten mile radius up to a whopping three.
 I digress I urge you to try this curry because it is the kind that can soothe any hunger pangs all year round, warming in winter and fresh in summer and utterly scrum my and good for you!

1 cup of ash gourd cut into batons
1 cup of carrots cut int batons
1 cup of potatoes cut into batons
1 cup of chayote squash cut into batons
1 cup of indian drumsticks cut into batons
1 cup of plantain peeled and cut into batons
1 cup of French beans cut into two inch batons
1 tsp of turmeric
1 tsp of Maldon sea salt
2 cups of water

Spice paste:
1 cup of indian curd whisked up
1 cup freshly grated coconut, this can also be bought frozen
1 tsp cumin seeds
3 green chillies
1/4 tsp chilli powder


Tempered oil:
2 tbsp coconut oil
1 tsp mustard seed
1 tsp asafoetida
2 dried red chillies broken in half
20 curry leaves


Finishing touches:
2 tsp Maldon sea salt
1 tsp sugar

 Simply cut all of your chosen vegetables into batons roughly 5cm long and 1cm in circumference. Place all of  the vegetables, the tsp of maldon salt and turmeric into a pressure cooker with the water, if you do not have a pressure cooker a casserole pan with a lid will work just as well but you may have to top up the water should it evaporate. cook the vegetables until tender, roughly two whistles of the pressure cooker and 15-20 minutes in a conventional casserole pan.
 Meanwhile add all of the spice paste ingredients in a food processor and blitz until it is a fine paste, add this to the tender vegetables and mix well. In a frying pan add the coconut oil, when the oil is hot add the rest of the tempering ingredients and cook until the curry leaves start to crackle and the air is filled with the heady scent of spice, tip the tempered oil into the vegetable mixture and then finish with the salt and sugar, stir well and serve with fluffy rice!


Sunday 8 December 2013

Kymberly Redmonds Apple Pie


 I'm normally not one for social media, my humble blog is about as much publicity that I can muster, and despite the buzz of twitter and facebook I find myself lazily retreating away back into my lovely little kitchen..... there is one exception of course, I have become in instagram addict, purely because I get so much inspiration from fellow bloggers and foodies, this is why I loving living in a day and age when amazing recipes are so very accessible, you do not have to have a television show or a cook book to share an amazing recipe with the world. I Stumbled across a food blogger called "my mommas hands" ,this is a pretty amazing blog run by a very clever Canadian cook called Kymberly Redmond, wow that was a tongue twister!! Her style of food and ethos is very similar to mine, she too is willing to go to the ends of the earth to produce great food, even if the process takes days to get there, authenticity and patience is the key. I did find one particular recipe that stood out to me, she blogs about her old fashioned deep dish apple pie, those of you that regularly read my blog will know about my husbands affinity with apples, I thought that would be a good starting point. I have made many many apple pies before but this recipe was very different, I have been used to the English understated version, very simple and straight forward, a moderate amount of apples and a butter crust, I have also made a few experimental pies that where clearly no good as they have never made it onto the blog, but this apple pie is just perfection, the quintessential picture book apple pie. What is so different about this pie? the crust is made with vegetable shortening which produces an insanely crisp crust, there is tree's worth of apples in the pie, and the spicing is really key, Kymberly States that she likes her pie really cinnamony and gives you permission to use less if you desire, but I'm saying you can't use less, use the amount stated because she is spot on, any less and it would be pointless. I have converted the crust ingredients to grams for all you Brits and Kymberly states to use ginger crisp apples or Granny smith, I could not find ginger crisp apple over here so I have gone with the granny smiths. This is an amazing pie recipe and I'm really very excited to share it with you all because I know that from now on it will be the go to apple pie recipe. Well done Kymberly.

www.mymommashands.com
Old Fashioned Deep Dish Apple Pie (Filling)
  • 5 1/2 pounds of Granny smith appled, peeled cored and sliced into half inch slices
  • 1 large lemon juiced
  • 1/2 cup of brown sugar
  • 1/2 cup of white sugar
  • 1/2 tsp of salt
  • 3 tbsp of flour
  • 1 tbsp of ground cinnamon
  • 1 tsp of ginger powder
  • 1/4 tsp of freshly grated nutmeg
  • 3 tbsp of butter cut into small pieces
Mix together all of the filling ingredients together in a bowl ready to fill the pie crust, make sure the spices and flour are evenly distributed amongst the apples.

For the crust:
  • 600g of plain flour 
  • 265g of trex vegetable shortening
  • 3 tbsp of sugar
  • 2 tsp of salt
  • 1 egg
  • 100ml of cold water
Preheat the oven to 190 degrees c.
Grease a very large pie dish, roughly 30cm, with trex.
Place the flour, sugar, salt and trex into a bowl and using a pastry cutter cut the shortening together until it is the size of small peas, this can also be done in the food processor on pulse. Add the egg and the cold water and mix until it starts to come together, do not overwork the dough as it will become tough.
Roll out half of the dough until 1/8 inch thick to form the base, making sure it overlaps the edge of the pie dish by at least an inch, this is to allow you to crimp the edges of the pie crust.
Fill the pie dish with the filling and then brush a little egg wash around the rim of the pastry bottom so that when you place the lid onto the pie it will nip together. Roll out the other half of the pastry to 1/8 inch thick and allow for at least an inch overlap all the way around. 


Press the edges together and trim the excess pastry, you can nip the edges of the pastry together using a fork or a traditional crimping method, decorate the pie with any excess pastry before egg washing with egg whites, sprinkle the top with a little coarse sugar for crunch and texture, cut a few holes in the top of the pie to let the steam out.
Bake in the oven for 50-60 minutes until the sugar begins to bubble out of the top of the pie crust.


Tuesday 26 November 2013

The perfect apple crumble


 As I have mentioned many MANY times before my husband has such a terrible sweet tooth, you name it, if it has sugar in he will eat it, he has even been known to dessert hunt in the early hours in the morning, rummaging in the fridge Nigella style! Thankfully for my husband he has a super speedy metabolism, and no matter how much cake and pudding he consumes he never gains an onze. My husbands favourite dessert is usually anything to do with apples, he is a total pomme junkie! When he wants me to make him a dessert he has a particular strategy, he mentions either his mothers or grandmothers desserts, this is so that subliminally it gets in my head, and being the super competitive person I am, I then make it my life's mission to test recipe after recipe until I come up with what I consider the holy grail classic!
 Now here is the science to this recipe, bake the crumble or crisp topping (depending on which part of the world you are from) separately, guaranteed crumble perfection, crisp crumble and soft fruit! You can adapt the fruit to your preference of course but I think half the quantity of tart cooking apples to half firm super sweet apples makes for the ultimate flavour and texture sensation.
 It is not very often my husband is silent, but there was no time for talking whilst he wolfed down this pudding!

For the filling:
250g of pink lady apples, peeled, cored and sliced
250g of Bramley apples, peeled, cored and sliced
100g caster sugar
100g brown sugar
1 tsp almond extract
The zest of an orange
The juice of half an orange
The juice of a lemon
1 tsp of cinnamon
1/4 tsp of  freshly grated nutmeg
50g butter

For the crumble:
75g rolled oats
250g of flour
150g of butter
75g caster sugar
1 tsp cinnamon
1/2 tsp Maldon salt

Preheat the oven to 180 degrees c
Butter a 20cm by 15cm pie dish. (Zest the orange first as a juiced orange is impossible to zest. Peel, core and slice the apples place them in a bowl and toss them immediately in the citrus juices. Add all of the rest of filling ingredients apart from the butter and then toss well so the flavouring are well distributed. Place a sheet of grease proof, then tin foil over the baking dish and then bake the apples for 25-30 minutes until some of the apples are soft and some are broken down.
 Meanwhile to make the crumble: add the butter, flour and sugar into a bowl and rub the fat into the dry ingredients using your finger tips, this process should continue until it begins to resemble rough sand.
 Finally add the salt, cinnamon and oats, give the crumble a final toss, I like to pinch the dough to make larger chunks of crumble but the is purely preference. Decant the crumble into a lined baking sheet and then cook for 20 - 25 minutes at the same temperature as the filling, be aware that you must toss the crumble topping for even coloration. Once the crumble topping and fruit filling are ready, decant the crumble on top of the fruit, sprinkle a tablespoon of Demerara sugar onto the crumble top for added crunch! If cooking this from cooled I suggest it will need 20-25 minutes to heat through, but is you are cooking this immediately it will only take ten minutes! Serve with custard, it's the law!


Monday 25 November 2013

Lemon and poppy seed cake


 I hate to quote the words of the Fresh Prince of Bel air but...... this is a story all about how I became unhealthily obsessed with a cake. For those of you who know me personally will know that I do not do cake, I know it is hard to believe because I make them all the bloomin' time, but I assure you if I had an enormous piece of chocolate cake and a plate of cheese and crackers in front of me I would take the cheese and crackers every single time. However once in a while something comes along that makes you a believer, brings meaning to the word "cake" and makes you long so hard for the crumbly goodness that you are willing to make a cake pilgrimage for over an hour just to have one sweet indulgent moment, and in that moment I understand all my husbands cake-a-betic needs. 
 This cake was originally made in a Leeds based Deli called "Salts", I have to admit that I didn't actually buy it for myself, but as the minutes ticked by and I swear the cake began to talk to me, I tore off a small crumb, not too much because this was after all someone else's cake, I flicked the crumb into my mouth and it was like an LSD moment, the whole world danced and spun around me and all I could see was a lemony hue of cakey loveliness, that was when I decided I didn't much like the person I had bought the cake for anyway and I wolfed it down, besides the love affair with Salts Lemon drizzle cake lasted longer and brought me more happiness anyway. The thing is, it is almost sticky, moist, tart but not to tart, just how it should be. When I met my husband I introduced him to my other love of my life and despite my husband not being the biggest fan of citrus he absolutely adored it. Then a couple of years ago the world came crashing down on me and life  stopped making sense, SALTS HAS CEASED! So that was it, do I live with my love as a distant memory or do I figure out this recipe once and for all? It has taken countless batches of lemon cake, sometimes I wanted to throw the towel in but i'm glad I didn't because this recipe is the S***! Lemon Lovers enjoy!

Lemon Drizzle Cake

150g softened butter
200g caster sugar
100g golden marzipan
100g ground almonds
2 tsp of lemon extract
1 tsp of almond extract
1 tsp vanilla extract
the zest of two large unwaxed lemons
150g self raising flour
1 tbsp poppy seeds
1 tsp baking powder
1/2 tsp salt
3 eggs
For the topping:
200g icing sugar
Juice of two lemons
1 tsp of lemon extract
2 tsp of poppy seeds


Preheat the oven to 180 degrees c. Either grease and line a 20cm by 20cm cake tin or use a silicone mould as shown.
Cream together the softened butter and sugar, this can be done with a hand whisk. Add the vanilla and marzipan, the whisks will break down the marzipan but you will need a little patience, add the eggs whisking in one at a time, add the almonds, salt, poppy seeds, lemon extract, vanilla extract and almond extract. Finally sieve in the flour and baking powder and fold in until just combined. Decant the mixture into your chosen baking tin and cook for 25-30 minutes or until you can insert a skewer into the middle and it comes out clean, set aside and allow to cool.
Meanwhile mix the lemon juice, extract and icing sugar together until smooth, spoon onto the cooled cake and then top with the poppy seeds.